| Home | Newsletter | Locations | Diary |
|
Indexes |
|
|
|
|
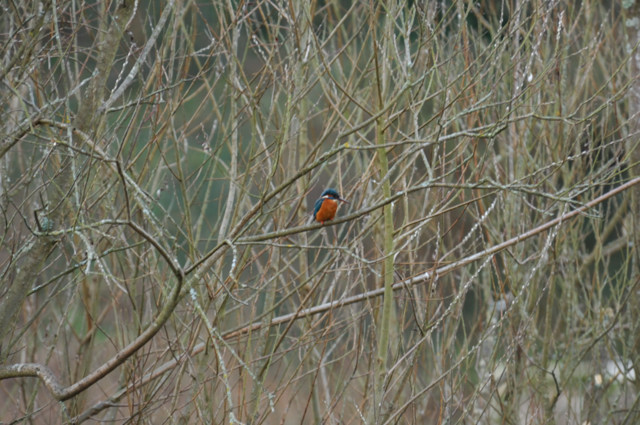
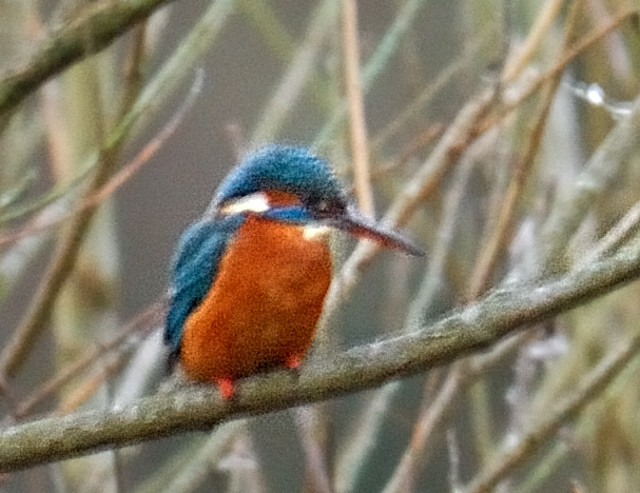
Article Various Ways To Take Close Ups Getting a closer view of something can be achieved in a variety of ways, including using a longer lens either a fixed (prime) lens or a telephoto, adding teleconverters to an existing lens or of course getting the camera closer. We can also later section a photograph. Many discount the sectioning approach, but if the resulting image that you require is not to be produced as a large print then this can often be a practical and sensible solution. Last weekend we visited Bibury, and some way from the path we could see a kingfisher sitting in the tree. It was far enough off that many who stopped to see what we were looking at had difficulty seeing it at all. I was using two cameras; I had an 18-200VR lens on a D300 and an 80-400VR on a D2X. In this situation I really needed a tripod and my 1000mm mirror lens, but didn’t have it with me. So I took just one shot with the 400mm lens, and while I could see on the monitor it was recorded, it wasn’t close enough to spend a lot more effort on. I then forgot all about it until I started to write this article. To illustrate the point can sectioning to get in closer, I thought I would have a go at editing the kingfisher shot, and wished at once I had more than one shot to select from. Below you will see two images, the first is the image as I took it, with the kingfisher rather small, and the second is the section, with about 3 minutes editing. You can click on these to see larger versions. OK not my finest photograph of a bird, but you can see what it is and it would be sufficient for a small image on a website, or the like. By the way you can click or double click on most images on this website to see larger versions.
If I had a teleconverter with me, I could have increased my focal length, I was using a 400mm (the equivalent of 600mm on a full frame like a 35mm or on the D3 Camera with FX sensor), and had I had a x2 teleconverter with me it would have made this into an 800mm (equivalent of 1200mm on full frame). But I would have lost around 3 stops, and the day was not that bright anyway, and the autofocus would not have functioned so it would have been down to manual focus. It is doubtful if this would have produced a good shot. Autofocus does not work with most teleconverters as the maximum aperture is not bright enough for autofocus to function. The Nikon teleconverters by the way will only connect up to a very small number of the Nikon lenses, so if you want to use a teleconverter you will most likely have to select one of a different make. You will find many x1.4, and x1.7 teleconverters will autofocus on bright days with some lenses, but not all, teleconverters often sound a good idea but in practice rarely seem to be of much help. So why did I not get closer, I was on a path and there was water, and some reeds between me and the kingfisher, nothing that could be walked on. One of the purposes for the visit was that my son had a new video camera for Christmas, and being new to video I had given him a few pointers and he was on his first trip out with it. He had a tripod and with the massive 2000 times zoom on his video camera he filmed several minutes of far closer mages than I could with my camera. Not bad for his first day out with a video camera. Video and TV cameras use far smaller sensors, therefore get a greater depth of field and far greater zoom than we do, also allowing for movement they tend to have a wider shot than you could in a photograph. Longer lens if we have them with us allows us to get a closer view, and as we said above adding a teleconverter to any lens can make it longer. Another alternative becoming popular with bird photographers is to connect a scope, a modern form of telescope, to a camera. There are special connectors that allow you to connect a camera to a scope. These arrangements however rarely allow autofocus and are quite dark by photography standards so the effective f stop is likely to be f13 or more. We have a full article on using digiscopes and a comparative article looking at when a digiscope and when a long lens is applicable and the benefits and costs of each, and these articles should appear within the next couple of weeks. I have a lot of close up photographs of birds, most with the 80-400VR lens, but a few with longer lenses, as well as some larger birds like swans, geese, pheasants and partridges with shorter lenses. To get a really good close up of a kingfisher, which is small bird, I would need to be a lot closer whatever lens I was using and ideally either be in a hide or camouflage set up near to where it is going to perch. The other alternative would be to be a little further back and have a camera set up in advance and operated with a remote control. All lenses have a minimum focusing distance, an often longer lenses have a far greater distance, and to move closer than this you have to put on close up lenses. These screw on like filters but then give you a greatly reduced focusing range. Close up lenses are available only in some filter sizes, so is not a practical solution for many. When selecting lenses it is a consideration as in some cases the closest focusing distance can be quite large for example the 80-400VR I like to use a lot has a closest focusing distance of around 7ft and the 1000mm mirror lens won't focus closer than 8 feet. Other options to allow us to focus closer are tubes and bellows explained below. Some lenses have closer focusing, some have a macro capability, that allows you to get very close. Some makes like Sigma and Tamron have zoom lenses that they class as macro lenses, while Nikon macro lenses are prime (fixed length) lenses. Take for example the Sigma 28-300 f3.5-f6.3 Macro, this has the capability to focus directly down to half a meter or 1.64 feet with a maximum magnification of 1:3, this means that the item being photographed will be reduced in size to a third. Nikon macro lenses are up to 1:1 so give exact size reproduction or three times greater than the one above. Nikon don’t class the Nikon 18-200VR lens as a macro lens although it can focus down to half a metre at all zoom settings and closer in some situations. The maximum working magnification on these two lenses is about the same. We ultimately get to a limit whatever lens we select and usually the best is 1:1 as with the Nikon macro lenses. However any lens can focus closer if we add a spacer between the lens and camera, in many cases however the range over which we can get items in focus is greatly reduced, and this is used mostly for getting very close to items, for example taking the portrait of a bee or a close up of a flower. Tubes normally come in sets of three of different sizes and can be used in various combinations of one any two or all three, while a bellows usually can be varied over a larger range but often requires a tube to be fitted first to get far enough away to cope with the cameras handle. If you connect both a set of tubes and bellows together or a bellows with extension then eventually you get to a point where the target is so near the lens that little or no light can reach it. To overcome this you reverse the lenses with an adaptor, and this also further increases the magnification, and with a camera set up this way you can photograph through the eye of a needle. Macro photography is of course a large subject in its own right with complications around sharpness, reduced depth of field and lighting. As well as our normal flash outfit we have the Nikon R1C1 kit which has two SB-R200 flash units and lots of accessories, and we have extended this with two more SB-R200's, but can also use it in combination with our other flash units as a part of the creative lighting system. Reflectors of course also play an important part in all lighting arrangements, and also most clients equipped with the knowledge and experience gained with us, use far less equipment than they initially expect to get very good results. Often for flower, still life, product, and similar photography that is closer than normal photography but not down to macro we can use light cubes, and we have a variety of these from a small one for photographing jewellery up to a 5ft cube, that you could even place a person in. See Also
|
||||||
|
||||||
.
|
||||||
|
|